Friday 4 October 2013

Ellie Matilda Gatehouse

I have been really neglectful in not posting some pics of my little step-granddaughter, Ellie.  She was born on 9 August 2013 at 5:04am weighing in at a healthy 8lb 12ozs.  Her dad, Michael (Jan's son) and mum, Anna, had to go down to Invercargill for her birth (from their home in Te Anau) and were then transferred to Tuatapere when she was only a few hours old.  She is 8 weeks old today, my how the time has flown.  Here are some pics -


As you can see she is a happy wee dot.  Nana Jan has already been down for a few days and had cuddles - I am waiting patiently ... not.  I suspect she is going to be spoilt by her grandparents and Aunty Sarah and why not, she's a little cutie pie.

Cat family layout

My blog has been neglected yet again, and apologies to those of you who keep coming back only to find there is nothing new.  Life has been rather hectic of late - in the last few months we have 'lost' our dear friends Shane and Robyn, my bosses adored husband Gary, my cousins dad Bob, Jan's mum Naomi, and most recently Jan's much loved friend Ann.  We also had to have our wee Mac put down.  On a happier note we have been to Scrapfest and had an awesome time (more posts about that) and we have also welcomed wee Ellie into our family (more about her in another post).

Anyway, I wanted to share with you my latest layout about a little cat family who made a big impact on my life many years ago.
The background was created using some of my washi tape collection.  I have had no end of hassling about how many rolls I have so I thought I'd better start showing that I do in fact use it and it is not solely for decoration.  I've used a little bit of mulberry paper as a matt for the journaling and mother cat has been matted on chipboard and inked around the edges.  The filmstrip was cut on my eClips from a template I created - this allows me to scale it up or down to the size I want/need.  My wee girl, Chi, was such a little princess and had such a short wee life that I felt it only appropriate to give her a princess crown.  Our Kaycee is almost the spitting image of Chi.  The paper clip was made using a 'paw' brad I had in my stash and a black paper clip very kindly 'left' in my package of washi tape from Lowri McNabb @ Papervine.  The twine was adhered using Glossy Accents.

Monday 10 June 2013

Scrapfest by the Sea ... mini album

I'm loving being part of the Scrapfest family - what a great group of ladies.  The other day we had a wordfind challenge - hilarious.  There were supposed to be 12 words related to scrapbooking but people kept finding more and more words, some very loosely attributed to the craft such as vino, and box (we're going to need big ones), bad (sounds like some are planning to be) and so on.  I found about 35 words all up - heaps of fun.

The next challenge was for everyone to use the same photo in whatever way they wanted to create a layout, card, mini album etc.  The photo that was chosen was of the venue and here is the front cover of the mini album I've created.


Two weeks ago I was fortunate to be able to attend some wonderful workshops at Creative Adventure Downunder (CAD) - the tutors being Heidi Swapp, Teresa Collins, Donna Downey and Maggie Armstrong.  What a talented group and I learnt heaps from these awesome ladies and over the next little while I will slowly post some of the projects I made.  But for now ... the first workshop I did with Heidi involved making a mini album to go in a shadow box. 

I've used the same principles to create my Scrapfest album.  I've used cardstock to create the cover and pages for my album.  On the front I have stamped, punched, cut, glued and taped bits and pieces from Prima's Engraver and Almanac Collections and the Tim Holtz French Industrial Collection.  The bunting uses little tickets from the Almanac Collection, some bakers twine and little Christmas lights from my stash.  The piano keyboards are cut from the same collection and attached using pop dots to add dimension.  The pocket watch, from the Engraver collection, has been jazzed up using dimensional magic - just over the watch face.  I used a piece of clear packaging to stamp on a postmark from the Kaisercraft Pack Your Bags collection and adhered that under the keyboard on the left and then added three little roses from my stash to complete the cover. 

The finished album is going to evolve between now and Scrapfest and will be interactive with lots of things to open, pull out, lift up and so on.  There will be space for people to sign and write messages plus I hope to add lots of photos afterwards.

Cya.

Oh blog ... how I have neglected you

Oh my goodness, it has been so long.  I have been so busy creating that I have not been posting anything of what I have done over the past few weeks.  I must start putting that right, so here goes with a post to at least update my Art Journal.

There are four pages missing - that's over four weeks of not writing.  Tut tut!!!


After preparing the base I added texture paste through a piece of mesh and then melted wax crayons randomly on the page - interesting technique, but - note to self ... don't try and dry any additional layers - the heat make the crayons melt again LOL!!! 

This page came from a period of questioning myself, what I was doing,where I was going.  The text added reflects that - "In life we do things, some we wish we had never done, some we wish we could replay a million times in our heads, but they all make us who we are; and in the end they shape every detail about us.  If we were to reverse any of them we wouldn't be the person we are, so just live, make mistakes, have wonderful memories, but never ever second guess who you are, where you have been, and most importantly, where it is you're going.  Believe in yourself and your feelings.  Trust yourself to do what your heart is guiding you to do.  Your intuition is powerful.  Trust it.


Playing with new products - am loving my new Silks.  You can't see it here but there is sheet music underneath the dots.  I loved the quote that "It's not what you see, but how you see it" as what you see in this photo is only the surface - there is so much more hiding beneath.


I got a new book the other day about different surface treatments for creating art.  It is providing inspiration and ideas which I intend to trial in my journal before taking the ones I like onto canvas. 

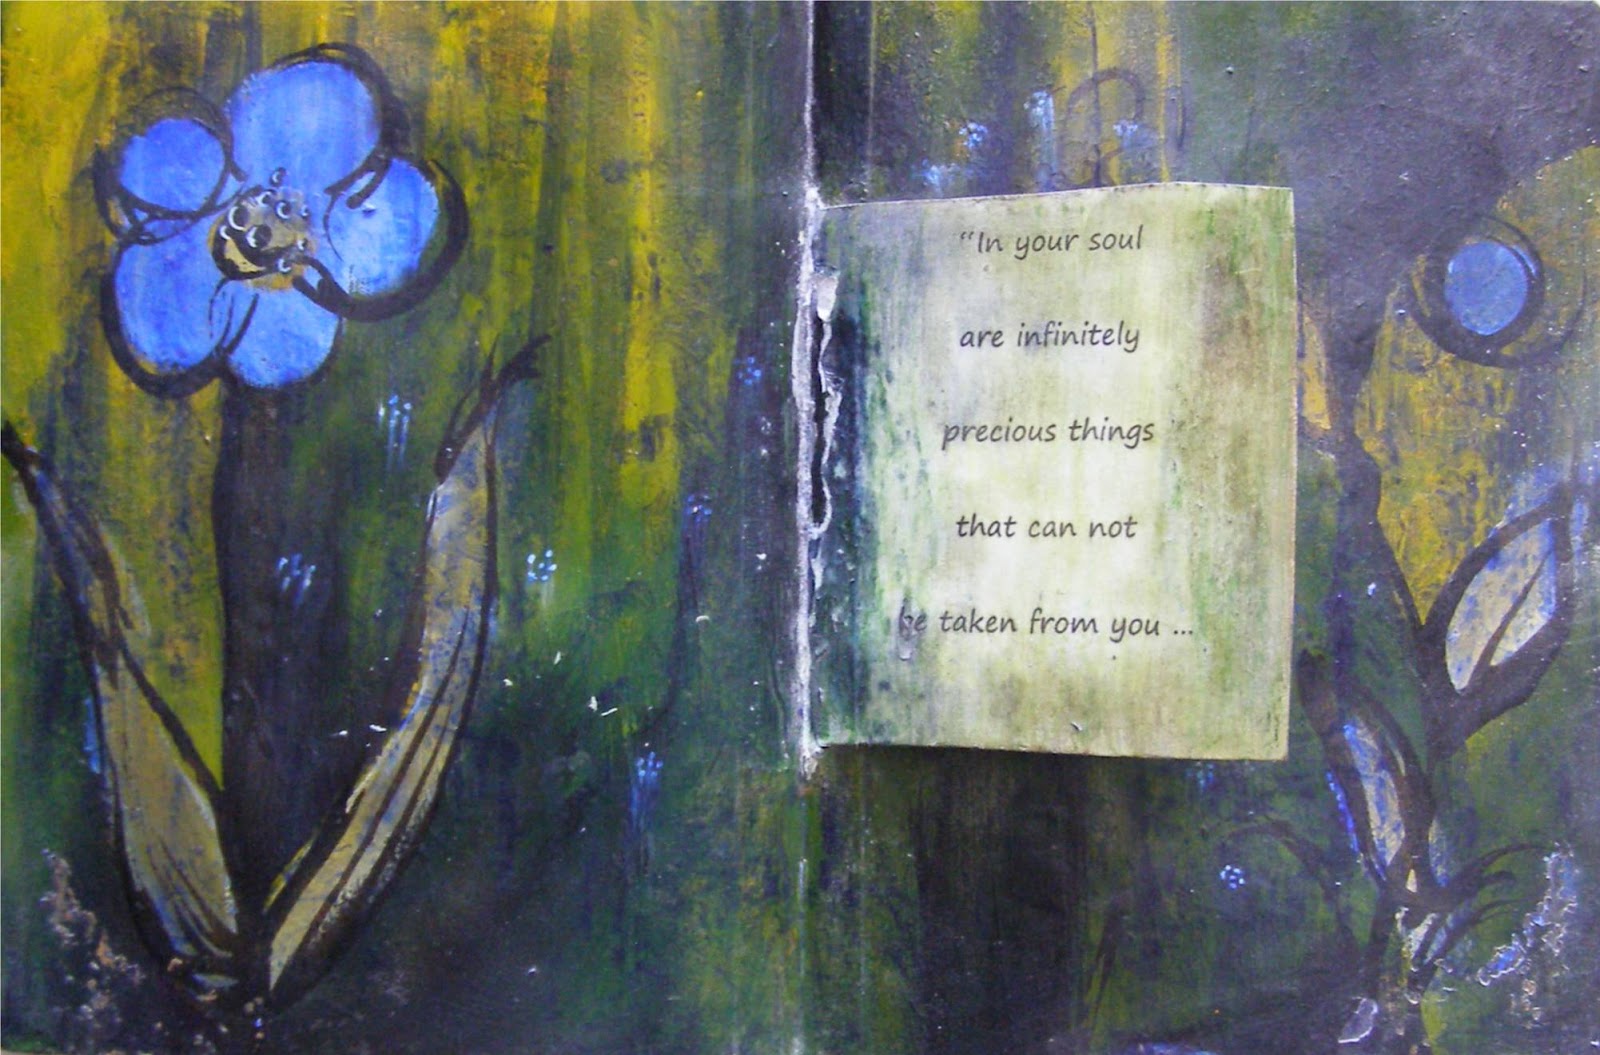
I started this page by using textured wallpaper and then adding a resist using vaseline (petroleum jelly).  Once you paint over the page you can wipe the vaseline off with a baby wipe and it exposes the underneath colour/s.  The technique can be repeated as often as you like to add more and more layers and depth to your background.  Once I had finished adding the layers I wanted, I lightly sanded the surface to expose the paper underneath.


The quote for this should actually read "where words fail; art speaks" but I wanted the emphasis on the word "art".   The script on the right is about art and has been applied using gel medium through a The Crafters Workshop template.  I used a Donna Downey template underneath and sponged pan pastels through it. 

That's it for this post - more to come on other projects ...watch this space.

Monday 6 May 2013

Art from the heart

Another week has gone by and I have been playing with Twinkling H2O's - wet on wet.  The background was created with pages from an old book.  I discovered that the paper is fairly absorbent and by spritzing first, brushing and blobbing on the Twinkling H2O's and then spritzing again before leaving to dry, I got a lovely mix of blended colour and then hard lines where it had dried.  I've used some texture paste through a stencil, added random drops of Adirondack 'Denim' alcohol ink, some doodles, distress inks direct from the pad and a little bit of iridescent medium all the while spritzing with more water until I got it looking sort of close to where I wanted it to be.  A wash of gesso toned the colours down and blended them further.


The quote is my own - "It's not about creating a great work of art; it's the process of drawing art from the heart".  What it basically means is that the process is more important than the product.  Since following this principle I have enjoyed creating more and actually found some satisfaction not only through the process but with the end product.   That was a bonus.  I have come to the conclusion that to approach art or creating in this manner takes the pressure off having to make art - where it has to look like something.  Goodness only knows how many times I was told I couldn't draw at school (I know, you can relate!).  Actually I can draw and I can paint but I just look at and see things differently to what the teachers expectations were and the curriculum stipulated.  So go on, have a play, and see where it takes you.  You might just be amazed.

Monday 29 April 2013

Happy in my play

Oh to have a day when I can puddle ... and today is that day.  No appointments, nothing that I have to do, just a day to be ... so I did.


There is absolutely no rhyme or reason for what is on this page, I just wanted to play.  I have used gold paint around the edges and to create the honeycomb effect using a TCW stencil - chicken wire reversed (The Crafters Workshop).  There is a little bit of Twinkling H2O pewter in the corners and a wash of gesso over the entire page.  The words "joy" and "play" are chipboard alphas which have been painted and then done over with nail polish (gold and then black crackle).  The 'leaves' were cut from an old story book, inked around the edges and then the paint dripped down, spritzing it with water to make it splay out everywhere.

Jemima Puddleduck, that's me.

Saturday 27 April 2013

Creativity takes courage

When I was studying Art Therapy one of the phrases that struck a chord with me was "Trust the Process".  It was the title of a book by Shaun McNiff, a well known and well respected art therapist.  It takes courage to put yourself out there - art reveals your innermost thoughts and feelings and you really have to trust what is being put on the page.  As I started art journaling the significance of trusting the process became even more evident.  

When I open my journal to a new page I have no idea of where I am going to start nor what shape my art will take.  Apart from some seepage from previous pages, I really have a blank canvas.  I start with gesso - it's almost like that is getting me "in the mood" so to speak.  Then I see what jumps out at me from the supplies on my desk.  Sometimes it is paint, sometimes ink, sometimes texture - and then I just start playing.  At some point I feel like I am finished and I add the sentiment, give it a final coat of mod podge and I am done.  The sentiment sometimes comes to me as I work or once I have finished - however it happens, it is usually relevant to where I am at and what I have created - I have found that they usually go hand in hand.


When I look at what I have created I can see that there has been a process.  There are layers upon layers, sometimes ugly layers, sometimes beautiful layers, but all those layers make up the whole.  A bit like life really, isn't it.  Food for thought?


Sunday 21 April 2013

Scrapfest by the Sea Recipe Challenge

Another Scrapfest challenge.  This one is a recipe challenge - it can be a layout, a card, off the page or whatever but it must contain all of the following items -


1 piece of cardstock (any size) white 

At least 4 pieces of patterned paper (any size) text, music, floral & chevron   
 
At least 5 flowers check - double layer daisies
 
A piece of thread/string/ribbon seam binding ribbon dyed with distress inks 

Some texture paste gel medium with bubble wrap impression 

Some paint/spray paint, spray and ink 

A tag (any size) hiding under the ribbon (with a piece of the chevron paper attached) 

Something sparkly flower centres and each petal has kindy glitz (doesn't show up too well in the photo) 

And 4 photos filmstrip with photos - special effects added to change the colour

This is my interpretation -
 

Thanks for looking.
 

Wednesday 17 April 2013

Afraid of failure???

As always, my art journal seems to always end up reflecting what is hiding/lurking in my sub-conscious and this one is no exception.

When I was diagnosed with Lymphoma, someone suggested I write a bucket list - things I wanted to do, things I wanted to achieve.  This was not so much of the "having to get them done before I die" mentality but really having something to look forward to and focus on living.  Some of them terrified me, like skydiving, something that fascinates me but scares me at the same time (I've always joked that this one was just pencilled in).  At the time I figured that if I was going to die then I must as well give it a go as I had nothing to lose - right?!?!   

Anyway, I have always wanted to be a model but, of course, did not have the right physique or looks for that, and definitely did not have the courage.  A couple of weeks ago I plucked up courage to answer an ad looking for 'normal' people - so I applied (what was I thinking).  I got an interview and last week got a call back for a photo shoot.  As it gets closer I have had second thoughts - is the company legit? can I afford to do this? will I be able to find the time?  All these things have been running through my mind.  As I was playing around with different techniques and paints in my journal, this quote was playing around in my head - "don't be afraid to fail; be afraid not to try".  So that is what I am going to do, I am going to try.  I have no idea where this is going to take me but I will never know if I don't try.  My photo shoot is this Friday and we will see what happens from there.


The background is a textured handmade paper from Paperzone and the stencil is from The Crafters Workshop collection - it's called Butterfly Meadow.  The pink flowers are my own creation.

Tuesday 9 April 2013

Metamorphosis


Well, this page certainly went through a transformation.  This is nothing like it started out as - the base coat was blocks of colour that had been taped off.  When I took off the tape I was left with bright white strips which I tried to diffuse by spritzing with glimmermist - that just left a horrible muddy puddle.  From there it was all downhill with each 'layer' getting muddier and muddier.  I put some torn paper on and cover the entire thing with a light layer of gesso and started again.  This is what evolved and the quote is just so appropriate.  This page could have ended quite badly but by persevering with it I like what it has become.  Just like the caterpillar, each layer in it's own right was lovely - my problem was that it just didn't all come together cohesively - until it turned into the butterfly.

That's a bit like life lately - there seems to be a lot of things happening which, in their own right, are challenging, interesting, sometimes confusing, but they are still separate entities - having to wait patiently for it all to come together before I can see the big picture.

Hmmm, wonder what will come out next week ...

Tuesday 2 April 2013

Simplicity


In the southern hemisphere we are moving through autumn and with the slightly cooler days a chance to clean up my art studio.  It has gotten a little out of control of late and was well overdue for a tidy up.  In the process I found products I had forgotten I had - things I used to use when I did glass painting, ceramics and the like. 

This page just started out as playing with what I had found to see what would happen.  The quote, by Leonardo da Vinci reads "simplicity is the ultimate sophistication" - seemed appropriate given the simplicity of the artwork.  However in pondering this further I have come to the conclusion that, for me, it is more about simplifying life rather than art.  How often do we complicate our lives and in the process put barriers in the way of being able to move forward.  Time to simplify - what do you reckon?


Wednesday 27 March 2013

The whole box of crayons

OMG I am loving this page and loving Twinkling H20's from Luminarte - check these out.  The colours are so vibrant but the photo does not really do it justice. 

I recently purchased 8 of these tiny pots and am in love.  They work like a watercolour only with an iridescent sheen as they contain mica particles.  Before starting you need to spritz the colours with water to activate them.  I put gesso my page as usual and just splattered each colour over the page until I felt like I had done enough.  The colours ran and blended together - to stop this happening you actually need to put some sort of absorbent ground on the page first but I didn't have any.  I brushed watered down white gesso and iridescent medium randomly over the page (separately - not mixed together), added some stickers and little swirls of kindy glitz before adding the quote.


The significance - well, if ever I am asked to define my 'style' whether it be art, scrapbooking, interior decorating, gardening, or my clothes - I would definitely say that I am eclectic.  I like / do a little bit of everything.  I like to use the whole box of crayons.  When I am working with art therapy clients I like to have a range of tools at my disposal.  When scrapbooking I like to try new things, new products, and will go with what and how I feel at the time.  My garden, home and clothes are a reflection of my eclecticism - they are what I like and definitely no particular style - I tried that and it doesn't sit comfortably with me at all.

How comfortable are you about using the whole box of crayons?  If you haven't done it before, maybe give it a try - break out, you never know, you might like doing something different.

Ciao.

Monday 25 March 2013

Footprints on our heart


A little bit of reflection ...


The quote "Some people come into our lives and quickly go.  Some stay for a while and leave footprints on our hearts.  And we are never, ever the same."

Lots of people were thought about as I was preparing the base for this - the passing of Jan's mum, the loss of our friend Shane, the wee bub that Michael & Anna lost and the one she is carrying now, my much loved grandparents, friends I have lost touch with - all passed through my mind and my heart as I was painting. 

I had started with attaching a couple of pieces embossing - the clock (on the left) and leaves (on the right).  Several layers of colour later and am not happy with how dark it is ...  it was a few days before I had time to come back to it.  I painted the colours I had used in the base onto bubble wrap and pressed it onto the surface, did the same with white gesso, then randomly wiped a brown stamp pad over the page, outlined a few of the bubbles in black pencil, inked in some detail on the clock and the leaves and added the daisies - voila - done!  Finally in my happy place - I really had my doubts about this piece as it took a while to come together, but come together it did.

Thanks for looking.

Sunday 24 March 2013

Precious Memories

A couple of weeks late with this post - I just could not get this page finished - don't even know why the forget-me-not is there.  The painting part was finished but haven't found the right quote.  I have lots, just nothing jumps out at me.  At that point my computer died and had to go to the computer hospital so I just left it. 

A couple of days later, Jan's mum died.  It felt like there was some significance to the forget-me-not flower and when I googled I came across a quote.  The quote reads "In your soul are infinitely precious things that can not be taken from you ... no matter what happens". 


Forget-me-nots are the representation of true love and fond memories, a symbol of remembrance and hope.  They also have a link to Freemasonry, hugely significant to this family.  Suddenly it all fell into place.  While it has been a difficult time for everyone concerned, and there are huge adjustments to be made, I know that, no matter what happens, we will be okay.  It's hard when families cannot accept your life choices and particularly so at times like these.  This was a reminder to us that, no matter what happens, our memories and the things we count as precious, can never be taken away from us ... ever.

Thursday 21 March 2013

Scrapfest by the Sea - Blog Hop

Hey there

It's most likely you have reached my blog today via the Scrapfest blog hop.  Welcome.  There's not a lot to see yet as I'm still fairly new to blogging and I have lots more to learn.  My problem is finding the time to do it, what with all the scrapbooking, ATC challenges and the like.  Plus I have a new job working in a scrapbook shop - Paperzone in Frankton, Hamilton - so I seem to spend a lot of time preparing for the classes I teach.  I do a lot of what I call "research and development" that's really just another name for surfing the net looking for inspiration.

I'm looking forward to Scrapfest in August and meeting everyone I've met online - you all feel like old friends now.  We are going to have so much fun.

Anyhoo, this is a blog hop so I guess you want to hop along to see the next scrapper on the list.  thanks for stopping by - you are now off to Beth's Blog, hope to see you in August.

Saturday 9 March 2013

Creating a background paper

I wanted to share a technique I learned this week that was new to me.  The background for this paper was created using white linen cardstock, shaving cream (yes, shaving cream) and StazOn re-inkers. 


Firstly I laid down a bed of shaving cream on a glass plate, spreading it out with my palette knife.  The next step was to let little droplets fall from the re-inker bottles into the shaving cream.  My chosen colour scheme for this project was Ultramarine, Mustard and Cactus Green.  I used a meat skewer to move the droplets around until I was happy with the balance of colour.  Any object would work and different things would give different results.  The next part of the process was to press the cardstock down onto the shaving cream to 'print' the inks onto the cardstock.  I then set it aside to dry a little before carefully wiping off the shaving cream and then letting it dry fully.  A little bit of glimmermist spritzed through a stencil, a few splashes of indian ink, trimmed and distressed edges, and I was ready to use it on my layout.

TIP:  if you are going to have a go at this technique may I suggest you use a shaving cream you like the smell of as it tends to linger around ... for quite a while LOL!!! 

I love the finished LO, I hope you do too.  Thanks for looking.

Thursday 7 March 2013

Filling your cup

"There is always music amongst the trees in the garden, but our hearts must be very quiet to hear it" - Minnie Ammonier.

These past couple of weeks I have had reason to ponder on these words, more so than usual, so it seemed appropriate to use them when journalling this week.  The actual art work is unimportant, the process of getting there was very important. 

I believe that we are given challenges in life for a reason. We learn from life, we grow because we face a challenge, move through it and come out the other side with new insights and knowledge.  Hey, this is not new, and it's definitely not rocket science. How we grow from our experiences really depends on how well we listen to that inner voice, or in this case, the music in the trees.

Recently I have had several friends face huge health challenges and this has left me questioning why bad things happen to nice people.  There will be a reason and by listening carefully to that inner voice we will find that reason. 

One is a "doer for others" and the message has been to slow down, take time out for self, take time to play.  When your cup is empty you do not have anything to give anyone else.  Only by having your own cup full and overflowing can you have something to offer to others.  The situation she is experiencing will enable her to help others more, but only once she learns to fill her own cup.  It has been a harsh lesson but she will get through it but right now it is a tough journey. Kia kaha my friends ... be strong.


The background is a mix of Pthalo Turquoise and Diarylide Yellow with black acrylic paint around the edges.  A music stamp was placed on the background before using The Crafters Workshop Mini Branches Reversed stencil with clear gel medium.  Once dry, a black staz-on ink pad was wiped over the top of the gel medium.  Iridescent medium was applied to parts of the page and then a light wash of the yellow paint was given to the whole page.  With the addition of washi tape and some india ink drips, the page felt finished.  The quote has been placed on the inclusion (which you can't see here as it is standing up towards the camera).

Tuesday 26 February 2013

In loving memory ...

Last Wednesday, a friend and former colleague, was killed in a car accident.  He leaves two sons and a soon to be born grand-daughter.  Last year the boys buried their mum, today they said farewell to their dad. Circumstances prevented me from attending the funeral today but I spent the time in reflection, creating a page in my journal in Shane's memory. 

This is my tribute to Shane Robson 12.8.61 - 20.2.13.


"Every life has an impact on this world."  You, my friend, made an impact on mine.  RIP Shane, you will be sorely missed.

Wednesday 20 February 2013

"Strive for progress ... not perfection"

The title pretty much sums up the purpose of my art journal.  I am finding much satisfaction in being able to play with products and techniques without worrying about 'spoiling' anything.  With the pressure off I am free to just play and see what happens.  The following page I have been working on over the past few days.
I started off with a wash of Pthalo Turquoise and Green Gold.  Once this was dry I used my new Mini Chicken Wire template from The Crafters Workshop and coarse textured gel from Reeves to add some dimension to the page.  I then let black india ink run and drip down the page before splattering droplets of ink across the page.  With a sea sponge I added black paint and iridescent medium.  It was then left like that for a couple of days.

Coming back to it today and the courier has been - he delivered my order of PanPastels.  I bought a starter set 'Extra Dark Shades' - there is pretty much a little bit of everything on here (gotta try everything LOL!!!).  The page was sealed with Mod Podge, the text added plus some pieces I accidentally tore when working on another project.  The paper is Pink Paislee "London Market" - keep a watch for the other project which I will post once I have it all together.

The two butterflies with stamped using Black Stazon and then I went over it with Kindy Glitz.  Gotta love that Kindy Glitz.  Not sure if I like the overall result but I love some of the techniques and medium used and I definitely loved playing. 

Until next time ...

Tuesday 12 February 2013

Self Worth

Another challenging entry into my art journal.

I found this quote by the Buddha about self worth.  It reads "You can search throughout the entire universe for someone who is more deserving of your love and affection than you are yourself, and that person is not to be found anywhere.  You, yourself, as much as anybody in the entire universe, deserve your love and affection".  How hard is it to love yourself?  How hard is it to value yourself as a person, unique, one-of-a-kind, valuable human being?  Me, being a perfectionist, find this a challenge on a daily basis.  Journalling in this format is also a challenge for me.  My art is not perfect, it is what it is ... an expression of myself.

I started with drawing the patchwork pattern with PVA glue.  After letting it dry I filled each area with a wash of Quinacridone Magenta, Green Gold, Phthalo Turquoise, Diarylide Yellow and Anthraquinone Blue.  Once dry I took similar toned oil pastels and did a little shading and then covered the page with an iridescent medium.  Bubblewrap covered with Payne's Grey acrylic paint was then randomly applied and then indian ink painted over the now dry PVA glue.  After applying the text, the circle was created using Payne's Grey applied to a milk bottle top and stamped onto the page and Kindy Glitz applied to emphasise, before finishing with a layer of Mod Podge.

Wednesday 6 February 2013

Obstacles ...

Hi everyone

I have been picking up quotes lately that challenge me and this one is no exception.  A week has gone by since I posted the first page in my art journal.  Today I completed page 2 and the quote for today was around obstacles.  I had picked up the brick stencil from Paperzone earlier in the week so it seemed to fit with what I was thinking about.  How many times do we put obstacles in the way of doing something ... "I can't do that because ...".  I know I am as guilty of that as the next person.  I am the only person standing in the way of me achieving anything.

I used Quinacridone Magenta and Diarylide Yellow for my base followed by a light spritz of Tattered Angels Glimmermist called Blarney (lime green).  After drying off with my heat gun I spread coarse texture gel over the "Mini Bricks" stencil from The Crafters Workshop.  A little dirtying up with some indian ink rubbed on with a paper towel, a couple of heat embossed flowers, the quote, a pic of me and the obligatory date tag and we're done.  Enjoy.


Monday 28 January 2013

Art Journal

Me again

I have been having a play with my first ever Art Journal.  Inspired by Donna Downey's "Inspiration Wednesday" videos I have made my version of her with art paper and a canvas cover.  This is my first entry and I saw this quote on Pinterest and thought it would make a great start to my journal. 

The whole purpose of the journal is to explore ideas and different medium.  The thing is to keep going until you feel it is finished.  There are no mistakes as you just keep adding layers until you are happy with how it looks.

The colours I have used here are Pthalo Turquoise, Anthraquinone Blue and Diarylide Yellow with splashes of black Indian Ink.  I have inked the edges of the page using a black stamp pad.


Thanks Donna - you are an amazing artist and you inspire me every day.

Now, before I go, I just wanted to pass on my congratulations to Anna & Michael - they are expecting the arrival a wee bubs into their family in early August.  How exciting for Nana Jan (I have to admit that I am excited too). 

Tuesday 15 January 2013

Mini Album with Box

Hi

I have been working on another project just recently which I'd like to share with you.  I have started becoming a little bit more adventurous with my paper crafting skills and decided I would make a mini album and a box to put it in.  I am hoping that this might become a class at some stage. 

On the left is the box - using the base from a box given me by a friend I gave it a cover, making it look more like a little book.  When the cover is opened the box contains a mini album of old family photos and appropriate quotes. The inside of the box is lined with the same paper as the front and back covers of the album.  This particular album has two inserts cut from a sheet of cardstock giving 8 pages this could easily have been doubled.  As you will see below I have added eyelets, ribbon and small beads to add some interest.  The flowers on the box were handmade from matching cardstock and I have embossed the spine to give it more strength.  The flouish has been crackled - it actually started life a lot bigger than it is shown here but one of our darling kitties decided it was a great chew toy.  Never mind, a quick snip and a flick of sandpaper and it fits neatly against the top edge of the box.

This little album is ideal for all those little black and white snaps from days gone by.  The images are not dwarfed by the size of the page and the bright colour of the paper enhances the monochrome pictures.  For this particular album I printed the photos out in a sepia tone to complement the tonings of the paper.  Take a look and see what you think.  It is the first time I have attempted anything like this so I hope you like it..
Ciao for now, take care.

Saturday 12 January 2013

Lovely day out

Hi everyone

Have had a lovely day out today - a spot of lunch and some shopping in Tirau, a photo op at Lake Karapiro and then home.  Got some lovely pics -


and my pic of the day for all you scrapbookers out there - I found a Little Yellow Bicycle ...